


Hey there 👋
In this article, we're going to cover a way in which you can take your web games that are built with PhaserJS and convert them into applications that run on Android and/or iOS natively.
This might be something you want to do if you're developing a game which is specifically intended to run on mobile devices. By creating a native app on both Android and iOS, you're opening your game up to markets which would have otherwise been closed off.
Please note, this article assumes you have an existing PhaserJS game with which you will be working. If you don't have a project yet, feel free to create a blank game from the following template repo:
I'll be using the blank Phaser 3 project provided by that repo for this tutorial.
With that, let's kick things off.
Ensuring a mobile-first UX
The first thing you'll want to make sure of when creating a mobile game is that, well, your web game looks and behaves as if it's a mobile game. It's no good to create native app versions of your game if you're just taking a desktop game and shoving it inside a mobile app.
If your game was not originally built for mobile devices, this can be a lengthy process with a lot of gameplay mechanics/design decisions and is not to be taken lightly.
On the other hand, if you are creating your game fresh from the ground up, you have the opportunity to make these decisions from the onset.
In the case of my Phaser 3 boilerplate project, this means two things:
Make the game's viewport fit the full window, with no margin or padding.
Implement touchscreen controls for the cat-like character.
Making the viewport fit the window's viewport is simple enough. The first thing we'll do to accomplish this is open up the game's src/main.css file, and add the following styling:
html,
body {
  margin: 0;
  padding: 0;
}

canvas {
  display: block;
}
After that, we'll tell our game's width and height to occupy all available space in the window by opening src/game.js and modifying the following:
import './main.css';
import Phaser, {Game} from 'phaser';
import BootScene from './scenes/BootScene';
import GameScene from './scenes/GameScene';

const canvas = document.getElementById('game-canvas');
const config = {
  type: Phaser.WEBGL,
  width: window.innerWidth,
  height: window.innerHeight,
  canvas,
  physics: {
    default: 'arcade',
    arcade: {
      gravity: { y: 400 },
      debug: true
    }
  },
  scene: [
    BootScene,
    GameScene
  ]
};

const game = new Game(config);
With that out of the way let's look at implementing some basic touchscreen controls, to replace the default keyboard ones.
Open src/scenes/GameScene.js and make the following changes (or simply copy the following code and overwrite the game scene code):
import {Scene} from 'phaser';

class GameScene extends Scene {
  constructor() {
    super("scene-game");
  }

  create() {
    // Add, scale, and make up a speed for our creature
    this.cat = this.physics.add.sprite(10, 10, 'cat-like');
    this.cat.body.setAllowGravity(false);
    this.cat.setScale(0.5);

    this.downX = null;
    this.downY = null;
    this.maxSpeed = 300;
    this.speedMultiplier = 1.5;

    this.input.on('pointerdown', ({ x, y }) => {
      this.downX = x;
      this.downY = y;
    });

    this.input.on('pointermove', ({ x, y }) => {
      if (this.downX !== null && this.downY !== null) {
        const dx = (x - this.downX);
        const dy = (y - this.downY);

        const vx = Math.max(Math.min(dx * this.speedMultiplier, this.maxSpeed), -this.maxSpeed);
        const vy = Math.max(Math.min(dy * this.speedMultiplier, this.maxSpeed), -this.maxSpeed);

        this.cat.body.setVelocity(vx, vy);
      }
    });

    this.input.on('pointerup', () => {
      this.downX = null;
      this.downY = null;

      this.cat.body.setVelocity(0, 0);
    });
  }

}

export default GameScene;
Installing & configuring Capacitor
Capacitor was designed to be easily dropped into an existing web project and get you up and running with native apps in a low-friction way. So to that end, let's get started setting it up.
Open a terminal and navigate to your game's project folder, and run the following:
npm install # install dependencies, only if you haven't already
npm install @capacitor/core
npm install @capacitor/cli --save-dev
This will go off and fetch the core Capacitor libraries we'll be needing to port our game over to a native app.
After that's finished, run the following to initialize your Capacitor app:
npx cap init
This will present you with a short series of questions about your app, like so:
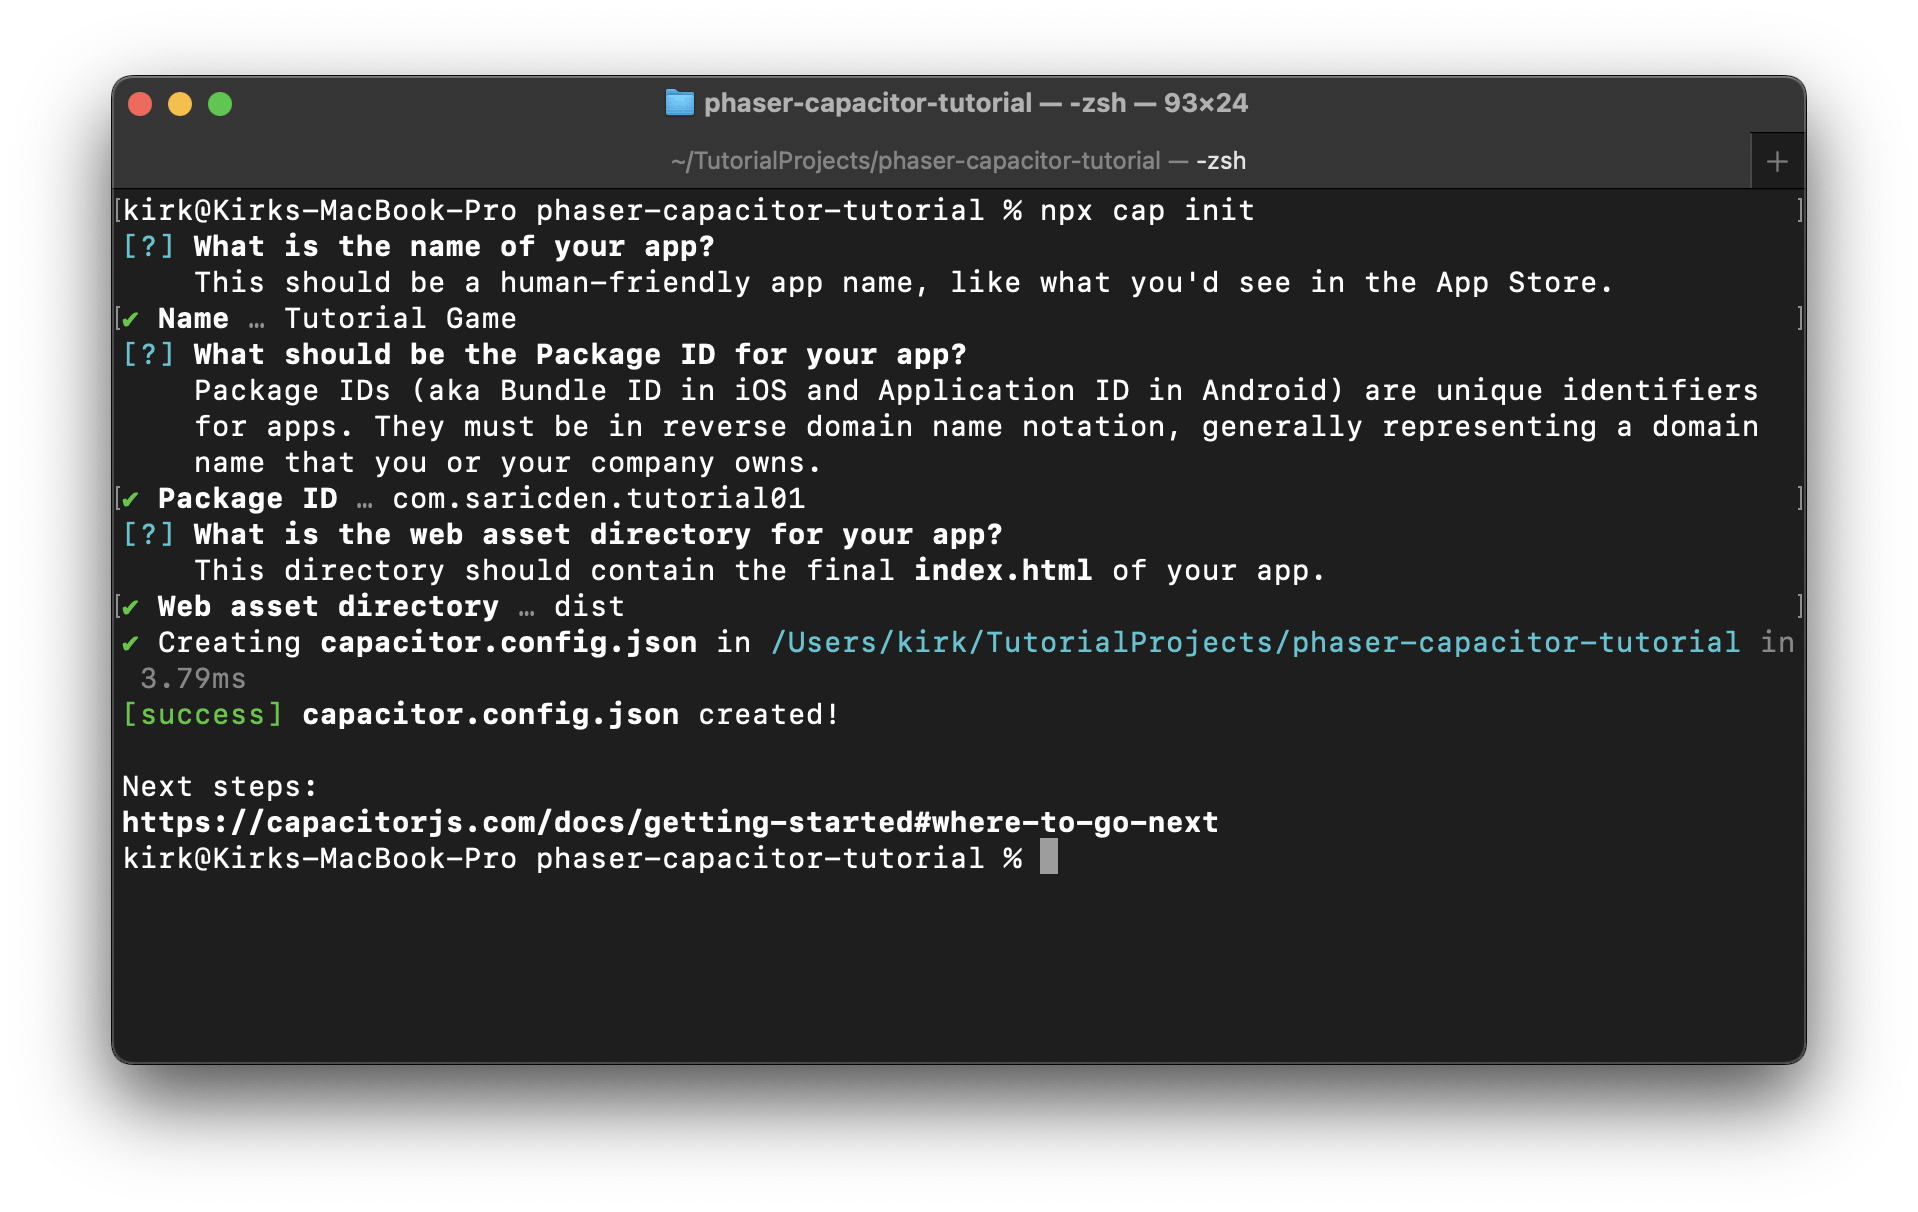
The most important question in this questionnaire is the last one, which asks you to provide a "Web assets directory." If you are using a game which was bootstrapped from my Phaser 3 ES6 boilerplate, you'll want to enter dist as the value for this question. Otherwise, just make sure to enter the location of your final build output for your game (the location which you would traditionally serve on the web).
With the installation and setup out of the way, the next step is to install the specific platforms you want to target.
In my case, I'm going to install both Android and iOS:
npm install @capacitor/android @capacitor/ios
Please note that before continuing, you need to have development environments set up for the platforms you wish to target. For Android, this requires installing Android Studio, while for iOS this requires a computer running Macos (sorry Linux & Windows folks 😢), alongside an installation of Xcode and CocoaPods.
Once both platforms (or whichever you're targeting) have been installed and your corresponding development environments have been set up, you'll want to run the following commands to create your platform-specific projects:
npx cap add android
npx cap add ios
Finally, with that done you can build your game's web code and sync it with your Android and iOS platform projects. In the case of my boilerplate, you'll want to run the following:
npm run build
npx cap sync
This will build the web code to our dist/ folder (which we specified earlier as our web assets directory), then the second command will sync those web assets with each of our platform-specific project folders (as well as sync any plugins installed).
If you are running the
synccommand on an Apple Silicon Mac computer (M1, M2, etc.) and are encountering issues on the step which runs apod install, as I was, please take a look at this Stack Overflow answer.
Next, we will look into compiling and installing the app on a real device.
Compiling and installing the app (Android)
After having synced the web assets with your platform-specific folders, the next step is to open each project and compile/install the project to a test device (you can also use a device emulator for this).
First I will demonstrate the process for Android because I have an Android phone with which I can test.
To open your project in Android Studio, run the following command from your terminal in your project folder:
npx cap open android
This will open a new instance of Android Studio, with your game's Android project folder loaded. You'll want to wait until Gradle finishes doing its thing (watch the progress bars in the bottom right of the window).
Once Gradle has completed setting up your project, you can either set up an Android phone emulator or link an actual device, then proceed to compile and install the app.
With your device linked, click this button in the top toolbar to build and run your app:
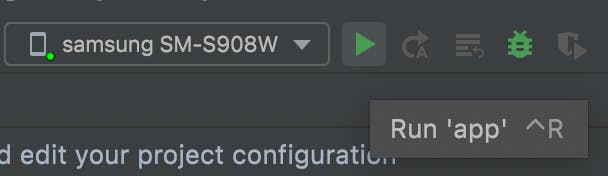
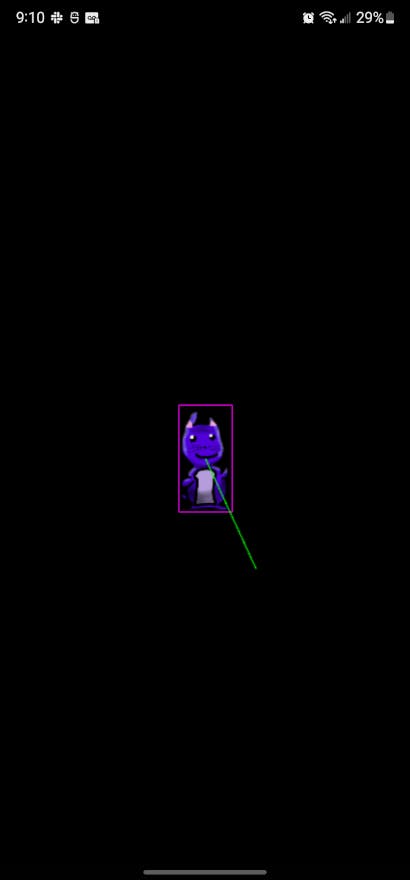
This will begin the build process (note if it's your first time running this, it may take a little while), and then proceed to install and run the application on your Android device (in this case, my phone).
If all is well and good (and you're using my boilerplate), you should be faced with something like this on your device:
Compiling and installing the app (iOS)
Much like we did on Android, we want to first open the project in the iOS-specific editor (Xcode):
npx cap open ios
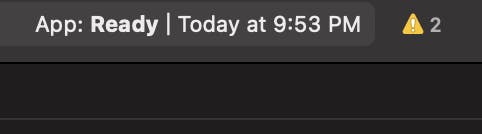
Once it opens in Xcode, wait a moment until the status bar reads "App: Ready", like so:
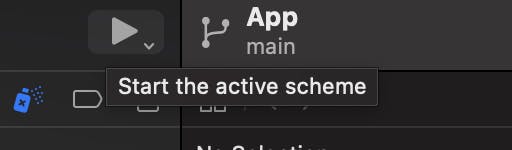
And then, with that message displayed, hit the play button to run your app either on a connected iOS device, or (in my case) on an emulator:
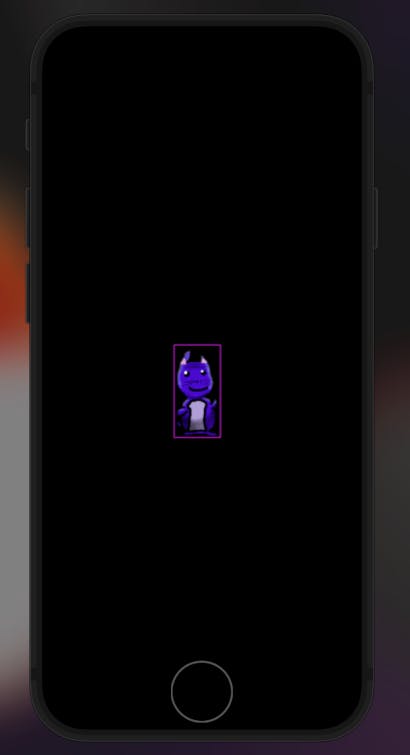
After pressing that button, it'll take a moment to build and install your app, but as long as this goes through without any issues, you'll see your app running on iOS shortly, like this:
Thanks for reading this article, if you found anything here particularly useful, or have a question, please feel free to add a comment to this post, or join our Discord and ask me directly.
Please note that you can also find the complete source code for my version of this tutorial's project here:
As always, keep on creating!